| |
|
|
-Project
TC250 Scrambler
|
|
|
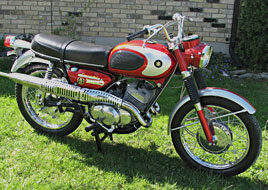
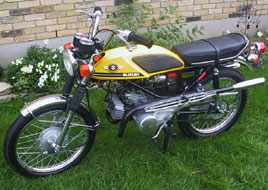
Reproduction Decals transforms this 1968 Suzuki TC250 from a pile rusty parts... |
|
|
This page is to
document the restoration of our X6 Scrambler. The legendary X6 set new
standards when it was introduced back in 1965. At the time there was
no other mass produced 250cc bike that could match it's performance.
In fact there were a lot of larger machines that couldn't keep up to
the X6. It was also known as the T20, Hustler, TC250, Scrambler and
the Super Six. Yours truly, |
 |
 |
 |
|
|
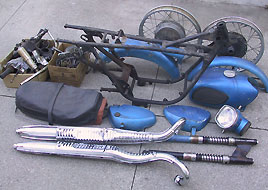
Here's
where it all began.
After a searching for some time, we found a pile of junk that was once an X6 Scrambler. This example was found close to home and belonged to my friend Bill Coulson, a fellow Suzuki enthusiast. |
 |
Although it looked terrible, all of the unique parts that set the TC250 apart from the T20 were there. The frame and engine matched and the price was right. The fact is, I had a tough time finding one of these here in Canada. After restoring my '74 H1 in similar condition, I swore I would never take on another basket case. |
 |
 |
|
|
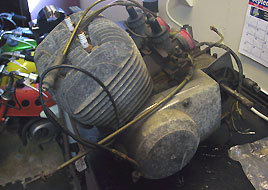
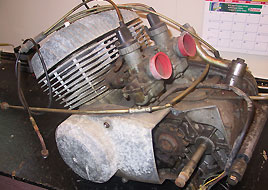
I
prefer to assess the mechanical condition of a motor before tear down
if possible. This one looks rough but turns freely, has reasonable compression
and the carburetors were drained before putting this lump into storage.
It is safe to say our local media blaster will see me soon.
|
|
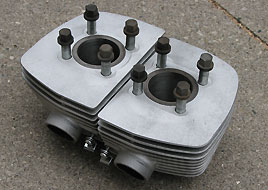
As
it turned out, the bores were scored and will require a rebore and new
pistons. It was evident that the ring locators became loose and damaged
the cylinder walls of both cylinders. What are the odds of both failing? To be sure this engine will be as good as new, the crank will get new bearings and seals, whether it looks okay or not. |
|
 |
|
|
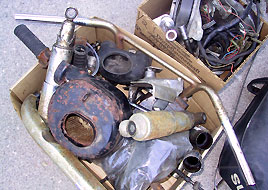
Another
picture to illustrate exactly what we were up against. Most of the small
parts in these boxes will be discarded and hopefully replaced with NOS
(new old stock) parts. The larger parts will be need to be media blasted
to prepare for painting, polishing or powder coating. Some parts will
have to be rechromed.
|
|
It's amazing what a difference it makes when almost 40 years of grime and corrosion are removed. Blast your cylinders before sending them off to be rebored. This will ensure you don't damage your newly bored cylinders. |
 |
 |
|
|
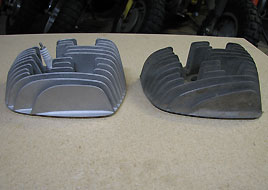
One
of our heads had a damaged fin. After searching high and low for a replacement,
we had the original repaired. Although the parts book does not show
a different part number, the TC250 head (left) and the T20 head (right)
are not the same. However, they will interchange.
|
|
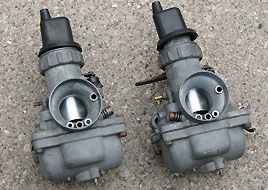
While a lot of the parts are out being blasted, chromed or powdercoated, this is a good time to do some of the smaller jobs like rebuilding and setting up the carbs. About an hour in our carburetor cleaner left them spotless, inside and out. After checking all of the small orifices are free from obstructions, it's time to start reassembly and adjusting the float levels. |
 |
 |
|
|
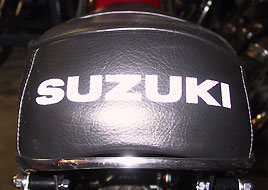
When
the seat came back from the upholstery shop, I was warned that "the
chrome trim doesn't seem to fit right". The seat looked great but
something was wrong with the trim. My trusted parts book showed no difference
between a TC250 and a T20 seat.
|
|
Close inspection of every picture I could find, revealed the answer. The TC seat curves up at the rear and I had the chrome strip from a T20. A call to my friend Gerald, known as Suzuki Canada, and I had a used seat with the right piece. |
 |
 |
|
|
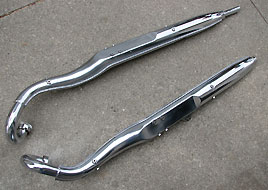
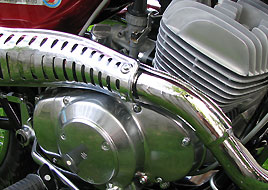
A
search on eBay and a set of NOS pipes were found in Thailand at a bargain
price. I knew rechroming my pipes would cost a fortune and there couldn't
be many sets of new pipes for sale. Fortunately, I had dealt with the
seller before and had no reservations about buying these pipes from
him. As most of us know, purchasing anything online is a gamble and
this time I was not disappointed.
|
|
My original heat shields are less than perfect. All of them have dents or scratches. Finding new ones is not likely, so straightening these ones and sending them off to be chromed seems to be the only option. I won't do anything just yet in case any better ones are located. I am still a long way from needing them. |
 |
 |
|
|
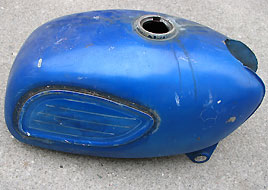
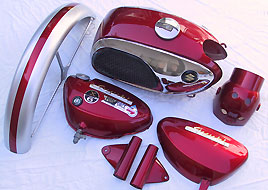
Here
is the tank that came with the pile of parts. It is a correct tank for
the 1968 TC250 but a previous owner thought it would look better with
the badges removed and custom paint that looked as if it was applied
using a roller. The indents for the badges were filled so the tank will
require stripping. In spite of it's appearace on the outside, the inside
is like new and this tank is worth saving.
|
|
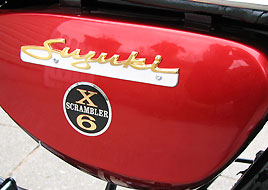
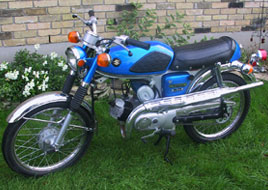
After a lot of work and the services of my friend Paul, here is the finished tank. This is a rare tank and based on my research it is corect only on the 1967 & 1968 TC250. This is the blue tank shown on the left after restoration and a set of NOS rubber knee pads and tank badges. |
 |
 |
|
|
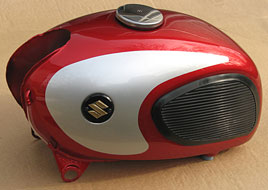
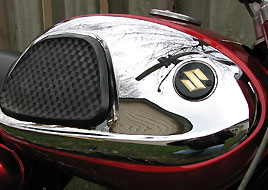
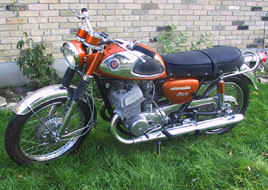
The TC250 also came with the T20 fuel tank with chrome panels. I prefer
this style but the TC tank above is rare in comparison. I decided to
have both tanks painted. This bike came with the silver & red painted
tank. Chrome sides or painted? I just can't decide.
|
|
The oil tank was repainted and new badges and decals were installed. The oil level window and oil cap were replaced with new ones. After years of use the plastic lenses always turn yellow and often develop cracks. This may be one of the most inexpensive items used on this project. |
 |
 |
|
|
The
side panel on the TC250 is not interchangeable with the T20. If you
start with a basket case, be sure you have the right one or you may
be searching for a long time. The TC cover can be identified by the
long mount on the bottom of the cover. Unfortunately this picture does
not show this detail.
|
|
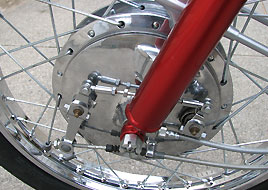
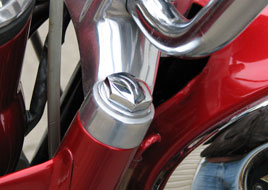
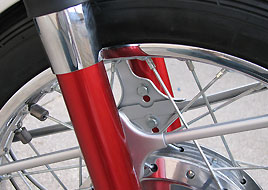
The fork legs were repainted and new seals were installed. The brake backing plate has been polished and all of the external pieces were replaced with NOS parts. This is often more cost effective than rechroming and will be more authentic. When parts are rechromed, they always turn out better than the original poor quality plating. |
 |
 |
|
|
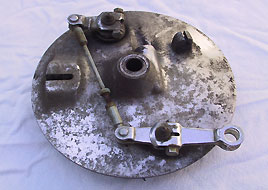
This
image shows how bad the original part looked before being polished.
|
|
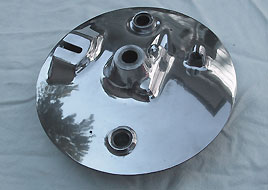
What a difference it makes when you polish the backing plate. The result is worth the effort |
 |
 |
|
|
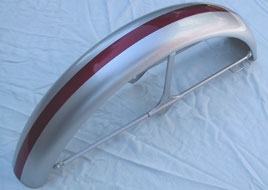
The
front fender has been repainted silver with the red stripe down the
middle. Later in the restoration, I discovered the TC has a different
fender to accommodate the wider front wheel. This fender is for a low
pipe T20.
|
|
All bolts, washers and fasteners are replaced and all aluminum parts have been polished. When you are restoring a bike to this standard, any fastener that is not new will stand out. |
 |
 |
|
|
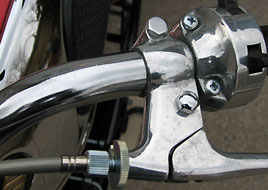
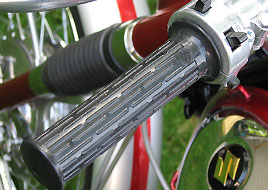
The
handlebar lever mounts, turn signal and throttle housings were all polished.
New cables and fasteners were installed.
|
|
Even small details like these retaining clips for cables make a big difference. Paul Miller Motorcycle was able to supply almost every part we replaced on this bike. He even had NOS fork boots! |
 |
 |
|
|
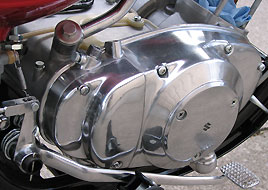
The
clutch and oil pump cover were polished to the correct finish and clear
coated. They look just like the originals. Don't polish covers to a
mirror finish if you want the bike to look right. Of course new screws
and bolts are a must.
|
|
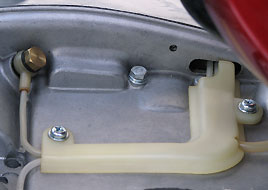
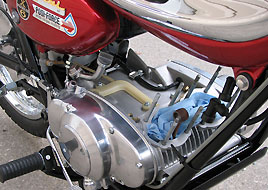
New plastic oil lines and cover make a big difference. The originals were in good useable condition but time had caused them to turn brown. If you can find replacements for these parts, it is well worth it. |
 |
 |
|
|
I
prefer to do all of my own mechanical work, including overhauling the
motor. The transmission was severely damaged and the crank needed bearings
and seals. Paul Miller had me ship the motor to him and his shop sent
it back looking like new.
|
|
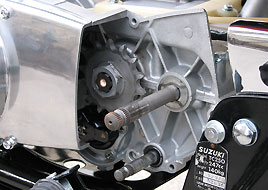
This picture shows the attention to detail, even on the parts that will not show when the sprocket cover is installed. Even the crank case bolts have the correct "S" on the heads. The engine and frame serial numbers are all correct on this bike. |
|
|
 |
|
|
The
cylinders are still at the machine shop. They need a rebore and will
be treated to a new set of pistons, rings, bearings and wrist pins.
When you are doing a restoration of this caliber, cutting corners is
not an option.
|
|
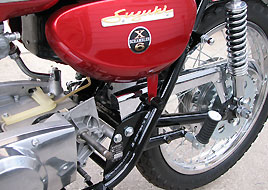
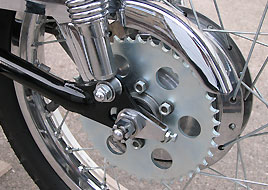
Everything back here is new, rechromed or polished. The shocks are reproductions and the sprocket, adjusters and hardware are all NOS. The rim and spokes are new and the hub was bead blasted and polished. |
 |
 |
|
|
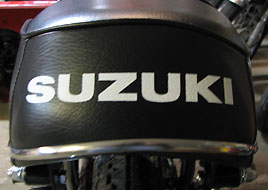
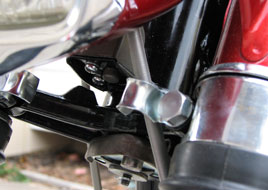
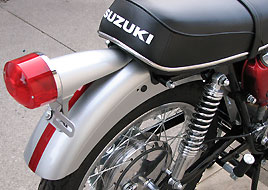
So
this is why the TC250 has a different seat! As this image illustrates,
the tail light bracket required more clearance at the rear of the seat.
The T20 tail light bracket does not go under the rear of the seat.
|
|
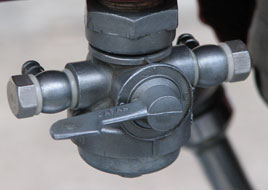
Here is the rebuilt petcock with new gaskets, freshly zinc plated bolts and the aluminum is refinished with the correct satin finish. If you polish the petcock too much it looks over restored. On a bike of this age some parts are hard replace. I bought an inexpensive kit and now I zinc plate small parts myself. |
 |
 |
|
|
The TC250 front fender has 4 mounting holes on each side to allow the
fender to be raised for off road use. This helps to prevent mud from
becoming trapped between the fender and front tire. The fender stays
are also wider. Be sure you use the correct fender on a scrambler or
it will rub on the tire.
|
|
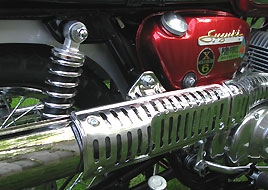
The low pipes on the T20 hold the rubber center stand bumpers. The TC uses a different stand which holds the bumpers which contact on the frame. The scrambler is more than a standard X6 with high pipes. There are more differences between these models than I had originally thought. |
 |
 |
|
|
The
newly rebored cylinders are in place. The pistons are .5 over GT380
forged pistons. These forged pistons are superior to the original cast
pistons. They are a direct replacement for standard T20 pistons. If
you go for this upgrade, be sure to use the GT380 piston pins with it.
They are 2mm shorter.
|
|
All of the wiring, fuel lines and cable are all connected. Synchronizing the carburetors must be done before installing the exhaust pipes. Removal of the oil pump cover also requires the removal of the right exhaust pipe. In other words, put the pipes on last. |
 |
 |
|
|
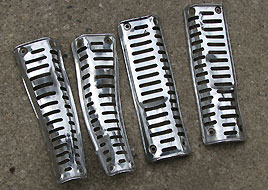
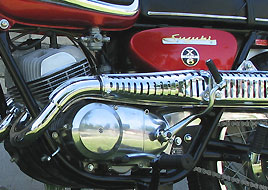
This
picture shows the pipe and heat shield. These guards are very thin and
finding a good set is not easy. Paul Miller came to the rescue with
an NOS set. He was also able to supply the tach cable that nobody else
had.
|
|
After a long search, the correct grips were located. The right hand grip was located on the other side of the globe. The earlier model grips with the waffle pattern are more common. |
|
 |
|
|
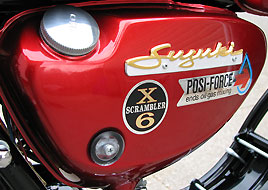
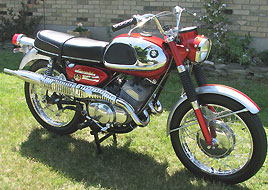
Here
it is! We're finally finished the TC250 project. It was a lot of work
but well worth the effort. This restoration is our best yet. Correct
in every detail, right down to the last nut and bolt. This scrambler
is as close to a new machine as you will find. This image shows our
scrambler with the painted tank. The image on the right shows the tank
with chrome panels.
|
|
The restoration of this TC250 was done to the standard they were when they rolled off the assembly line. It is not a "better than new" restoration. This is what you would have bought back in 1968. We are going to have to make room for some new show awards, because we have another winner here. |
 |
 |
|
| A
special thanks goes to Paul Miller. web site: http://www.millersvintage.com e-mail: vintagesuzuki@comcast.net telephone: 860 828-1220 Paul supplied the paintwork, loads of NOS parts, advice and information. Without him, this project would not have been possible. |
|
Our 1970 T125 Stinger II was restored in 2005. It was awarded "best in show" & "best vintage bike" it's first time in show competition. It looks great and it is fun to ride. This bike is now a permanent part of our collection. |
 |
 |
|
|
This
1969 AS50 Colt was completed early in 2005. It was in rough condition
but relatively complete. A good friend Gerald, known to some as "Suzuki
Canada" knew I wanted it. A deal was eventually struck and I got
a project bike and he now has carbon fiber exhaust for his Katana. Little
did I know how tough it is to find certain parts for this model. It
was well worth the effort.
|
|
Our 1968 T500 Cobra
also came to us as a complete bike. This one ran but the motor was completely
rebuilt. It was disassembled to restore and spent about 5 years in boxes.
When all of the parts to complete it were collected, it didn't take
long to assemble this very nice early T500. Restoration was completed
in 2004. |
|
Here
at Reproduction Decals we are committed to the preservation of motorcycling
history.
We don't just sell parts and graphics. We restore and ride vintage bikes. |
|
PARTS
SOURCES
|
|
Paul
Miller Motorcycle |
Reproduction
Decals |
| Wheel Building Service | ||
| Decal Application Instructions | ||
| Applying Decals on Plastic Parts | ||
| Seat Stencil Application Instructions | ||
| What if we don't have the decals for your motorcycle? | ||
| Frequently Asked Questions and Policies | ||
| BK Custom Coatings - Our Recommended Painter | ||
| Contact Us | ||
| Customer's Comments | ||
| Customer's Bikes - See our decals in use | ||
| Restoring Seat Trim | ||
| Restoring Gauge Faces - Back Lit Meters | ||
| Restoring Gauge Faces - Side Illuminated Meters | ||
| Restoring our 1970 Kawasaki H1 - In progress | ||
| Restoring our 1968 Suzuki TC250 Scrambler | ||
| Restoring our 1970 Suzuki T125 Stinger II | ||
| NOS Honda Keys. We have thousands! | ||
| Restoring an SL70 - Randy Marble shows us how | ||